Sunday, April 25, 2010

Craft Exchange

As I am getting ready for the upcoming NAMI craft exchange I realized that I never posted what I received from the last one. Here it is:

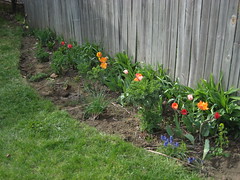
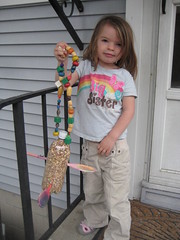
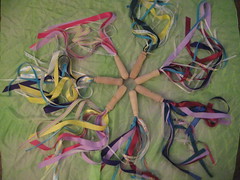
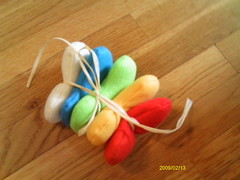
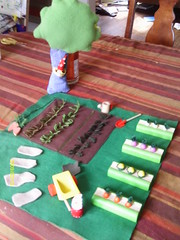
Snail from Jane, Mushrooms from Brynn, Playmat from Goldie with Tree from Chelsea (with garden set the girls got from Brynn for their birthday)

Tuesday, April 13, 2010

Oatmeal Fudge Bars

These are awesome!! Thanks, Evie, for finding this recipe

http://www.foodallergymama.com/2010/04/11/dairy-egg-and-nut-free-oatmeal-fudge-bars/?utm_source=Food+Allergy+Mama+News&utm_campaign=8a2d8c506a-RSS_EMAIL_CAMPAIGN&utm_medium=email

DAIRY, EGG AND NUT FREE OATMEAL FUDGE BARS

OATMEAL LAYER

1/2 c. dairy free shortening

1 c. brown sugar, firmly packed

1/4 c. unsweetened applesauce

1 tsp. vanilla

1 c. unbleached all purpose flour

1/2 tsp. baking soda

1/2 tsp. salt

2 c. old fashioned or quick cooking oats (I prefer old fashioned but use whatever you have)

FUDGE LAYER

1/2 c. unbleached all purpose flour

1/4 c. granulated sugar

1 1/2 dairy free chocolate chips (Enjoy Life or Divvies)

4 T. dairy free margarine (I use Fleischmans)

1 T. water

Preheat oven to 350 degrees and spray an 8 inch glass Pyrex baking dish with dairy free baking spray. Set aside.

In the bowl of a mixer fitted with the paddle attachment (or use a medium bowl with a wooden spoon) combine the shortening and sugar until light and fluffy. Add applesauce and vanilla and thoroughly combine. In a small separate bowl combine the flour, baking soda and salt with a wire whisk. Add to shortening mixture and stir well. Stir in oats. Reserve 1 cup of oatmeal mixture for topping. Spread the rest into the prepared glass dish using the back of a spoon or your fingers. Set aside.

Make Fudge Layer: In a microwave safe bowl combine the chocolate chips and dairy free margarine. Heat in the microwave 20 seconds at a time until the chips are just melted. Add 1 T. water and stir with a rubber spatula until combined. In a small bowl combine the 1/2 c. flour and 1/4 c. sugar with a wire whisk. Add the chocolate mixture to the flour mixture and stir until combined. Spread the fudge layer over the oatmeal layer. Sprinkle top with the reserved oatmeal mixture and spread with the back of a spoon or your fingers. Bake 20-25 minutes or until lightly browned. Cool completely before cutting into squares.

Monday, April 12, 2010

Garden


This weekend was an absolutely perfect spring weekend. I got to spend lots of time out in the yard getting the garden in order for the season. The big project I took on was to reshape the beds so that I had a nook for the playhouse & a little bit more room for the herbs & veggies. I believe I transplanted about 50 ft2 of grass and amazingly, I had just the right amount to fill in the parts that needed to be filled. I'm pretty happy with how things turned out. Oh, and when I took a closer look at my garden I found one of the carrots I never dug up last year. It was incredibly fragrant. There are a couple more in there and I think I'm going to see if they grow a bit more. Now I've got to decide what exactly to plant around the playhouse... fun, fun, fun!!

Mochi

My friend, Katherine introduced me to a new decadent treat; mochi! It is free of virtually all allergens and super yummy. We stuffed ours with honey and my only complaint is that it's a bit on the pricey side (though, perhaps that is a good thing or I'd be eating it constantly...) Here is a video to check it out:
http://www.cookusinterruptus.com/index.php?video_id=129

Thanks, Katherine!

Sunday, April 11, 2010

Bird Feeder


014
Originally uploaded by DDN and friends
Lillian and I had some friends over to make a bird feeder & here is our final project. She strung all the beads & painted the spoons. We hung it up but I'm thinking the birds don't like it as much as I do b/c it's still completely full.

Saturday, April 3, 2010

Lotion

An idea for later.... From Rosemary Gladstar's Herbal Recipes for Vibrant Life

Lotion
Waters:
2/3 cup distilled water (or rose water if you want a floral scent)
1/3 cup aloe vera gel
1 or 2 drops essential oil of choice (optional)
Vitamins A and E as desired

Oils:
3/4 cup apricot, almond or grapeseed oil
1/3 cup coconut oil or cocoa butter
1/4 teaspoon lanolin
1/2 to 1 ounce grated beeswax

1. Combine the waters in a glass measuring cup and set aside until they have reached room temperature.

2. In a double boiler over low heat, combine the oils. Heat them just enough to melt.

3. Pour the oils into a blender and let them cool to room temperature. The mixture should become thick, creamy, semisolid and cream colored. This cooling process can be hastened in the refrigerator, but keep an eye on it so it doesn't become too hard.

4. When the mixture has cooled, turn on the blender at its highest speed. In a slow, thin drizzle, pour the water mixture into the center vortex of the whirling oil mixture.

5. When most of the water mixture has been added to the oils, listen to the blender and watch the cream. When the blender coughs and chokes and the cream looks thick and white, like buttercream frosting, turn off the blender. You can slowly add more water, beating it in by hand with a spoon, but don't overbeat! The cream will thicken as it sets.

6. Pour into cream or lotion jars. Store in a cool location.

Notes: It is *very* important for the oils and the waters to be at room temperature - if they are not, they will not combine correctly and may separate. It is also important to have the oils in the blender and add the waters to them. Supposedly this order makes a big difference in getting the oils and the waters to combine easily. Also, if you are grating your own beeswax, it is a good idea to use a beeswax-only grater, as you will likely never get all the beeswax off of it...
From Rosemary Gladstar’s Family Herbal

Thursday, April 1, 2010

Doll Carrier for 3 year old birthday girl


We are going to be going to a birthday party for a 3 year old so Lillian and I made her a little gift. It's a doll carrier. I think I've improved the design from my earlier models. It now has a velcro latch in the front & the straps are a better size. Lillian picked out the fabric, helped cut the fabric and pressed down the pedal on the sewing machine.

Ribbon Wands


Ribbon Wands 3/2010
Originally uploaded by DDN and friends
Here are the ribbon wands I made for my NAMI craft exchange. 7 wands in total, 5 for the swap and one each for the girls from the bunny.